A friend of mine lamented over twitter this morning that she wants to be able to add a watermark to photos in photoshop. (Actually she wants to learn more about photoshop, so I foresee more of these posts coming as well)
I know how to do this so I thought I'd share.
But first, a disclaimer for Etsians.
A lot of the times when I'm making a treasury I want to feature something but it has a big fat watermark that ruins the photo. Be tasteful in your watermarks. I personally always crop my images for etsy to be 1000 pixels square. Etsy will crop your image to fit 170 x 135 for the front page, as well as for treasury features. (For the finds it's 200 pixels square)
This means that in order for your watermark to not be shown in the treasury it needs to be in the part of the image that gets cropped out.
If you want to just take treasuries and front page into account and not worry about the finds here is the math:
Figure out how tall your watermark is. Mine's 100px. Multiply that number by 2 (thus 200px) Because Etsy crops evenly on the top and bottom, that is how much you need to extend your image.
A 170 x 135 image becomes 1000 x 794 when enlarged to be 1000px wide. Thus to hide my 100px high watermark I need to make my image 1000 x 994. (But I'm just going to make it square because I like it that way)
Here's what the picture above looks like in a treasury.

Onto watermarking!
The easiest way I have found to watermark is to make a layer that you copy onto every image. Unfortunately you can't save layers in jpeg, gif or png, the three formats Etsy accepts. So make sure you save an unwatermarked version of the image before you save it with the watermark. In case you ever want to go back and change your watermark, crop the image etc etc.
So first we create the image we want for our water mark. To do this we want an invisible layer and a layer with our watermark design on it. (I like using white for my watermarks but you can experiment with other colors, it will be translucent when we are done) Because I like mine white, I like to have a temporary black layer so I can see what I'm working on.
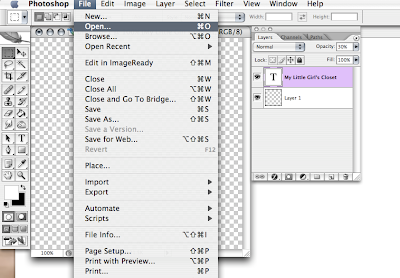
Open a new file. (I made mine square so I can play with how it'll fit on my images)

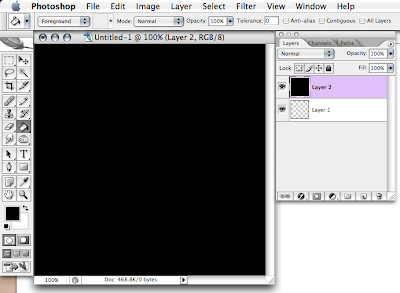
Make a new layer


Fill that layer in with black

The text tool will automatically make a new layer for your text.

Change the opacity of the layer (This might need to be adjusted after you apply it depending on the brightness of the image)

Delete the black layer

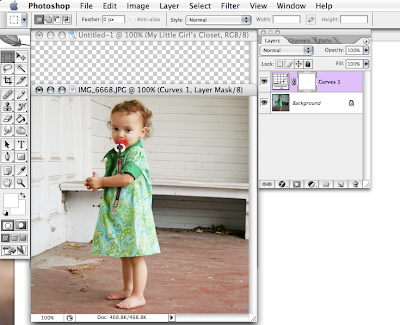
Open the image you want to watermark

Make any adjustments (see my curves layer?)

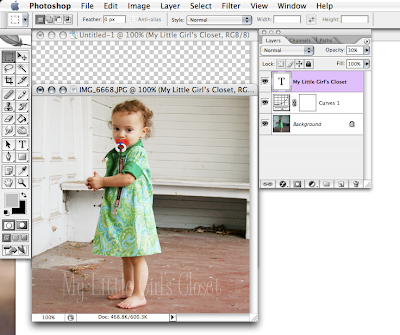
Drag the watermark layer onto the photo and drop it. Make sure the watermark layer is the very top layer. Move it to where you want it on the image and voila!


For folks who don't have Photoshop, Paint.net (http://paint.net/) is free and can do layers. NAYY.
ReplyDelete