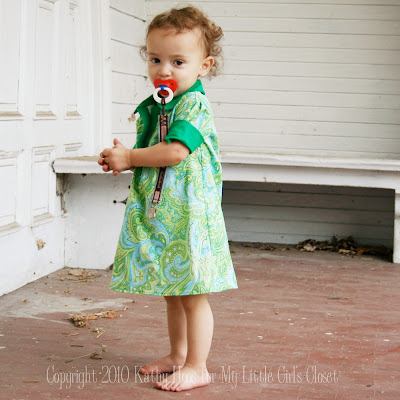
I thought I'd share with you what I normally look like when I blog. This might give you insight into why I don't blog nearly as much as I'd like.
I sneak everything into nap time. This little sweetheart, however, often needs to be held during her naps. She struggles to fall asleep - unless we're in the car.
(she's in my lap on a pillow in this picture)
So what have I been up to otherwise?
Well we're Home right now. Home for me is Ottawa. As much as we've made a home in New Jersey, if you ask me where I call home it's Ottawa. I hope one day the rest of my family will be able to say the same thing. Unfortunately there are certain obligations that keep us in New Jersey.
We took the girls to Park Safari. It's about a 3 hour drive from Ottawa. They have a safari where you drive around a route and look at all kinds of animals. Huge signs say "don't feed the zebras, they bite" but they were the only ones interested in the food we bought at the entrance.
We didn't feed the zebras but other people weren't as paranoid as I was.
Zebras don't eat babies do they?
We all had so much fun and T is still talking about the "seebas"
Thursday, August 5, 2010
Monday, July 26, 2010
Making a Watermark
A friend of mine lamented over twitter this morning that she wants to be able to add a watermark to photos in photoshop. (Actually she wants to learn more about photoshop, so I foresee more of these posts coming as well)
I know how to do this so I thought I'd share.
But first, a disclaimer for Etsians.
A lot of the times when I'm making a treasury I want to feature something but it has a big fat watermark that ruins the photo. Be tasteful in your watermarks. I personally always crop my images for etsy to be 1000 pixels square. Etsy will crop your image to fit 170 x 135 for the front page, as well as for treasury features. (For the finds it's 200 pixels square)
This means that in order for your watermark to not be shown in the treasury it needs to be in the part of the image that gets cropped out.
If you want to just take treasuries and front page into account and not worry about the finds here is the math:
Figure out how tall your watermark is. Mine's 100px. Multiply that number by 2 (thus 200px) Because Etsy crops evenly on the top and bottom, that is how much you need to extend your image.
A 170 x 135 image becomes 1000 x 794 when enlarged to be 1000px wide. Thus to hide my 100px high watermark I need to make my image 1000 x 994. (But I'm just going to make it square because I like it that way)
Here's what the picture above looks like in a treasury.
Onto watermarking!
The easiest way I have found to watermark is to make a layer that you copy onto every image. Unfortunately you can't save layers in jpeg, gif or png, the three formats Etsy accepts. So make sure you save an unwatermarked version of the image before you save it with the watermark. In case you ever want to go back and change your watermark, crop the image etc etc.
So first we create the image we want for our water mark. To do this we want an invisible layer and a layer with our watermark design on it. (I like using white for my watermarks but you can experiment with other colors, it will be translucent when we are done) Because I like mine white, I like to have a temporary black layer so I can see what I'm working on.
Open a new file. (I made mine square so I can play with how it'll fit on my images)
Make a new layer
Fill that layer in with black
The text tool will automatically make a new layer for your text.
Change the opacity of the layer (This might need to be adjusted after you apply it depending on the brightness of the image)
Delete the black layer
Open the image you want to watermark
Make any adjustments (see my curves layer?)
Drag the watermark layer onto the photo and drop it. Make sure the watermark layer is the very top layer. Move it to where you want it on the image and voila!
Sew Along: The Final Steps
To finish the dress you need bias tape for straps.
Bias tape is cut "on the bias" which means diagonally. This means it stretches and is A LOT easier to apply along curves.
I did a great tutorial on how to make bias tape from a small amount of fabric. Bias Tape Tutorial
Once you've made the bias tape, cut it to the length you need. (you can tell from the pattern, or you can estimate - though it's definitely better to guess too long than too short!)
Once you've made your strips, Fold in half and crease enough that you can find the center. Line the center of each strip up and pin to the center of the under arms as identified by the seam.
You'll have a section over hanging to make the ties with. (This image is from a different project so you can't see the over hang here)
Sew the strap to the underarm.
Then follow the directions in the Bias Tape Tutorial for making a clean strap end.
Fold over the bias tape and sew from one end to the other.
Repeat with the other side!
And the FINAL step?
Email me photos of your work so I can include you in the wrap up!
mylittlegirlscloset at gmail dot com
Wednesday, July 14, 2010
A little about me a little about you
One of my favorite blogs Luv in the Mommyhood has posted "a little about me and a little about you!"
I'll bite. Here are my answers. Want to join in? Take the first word of each line and fill in the rest! Post it on your blog and come back and link me!
Making: plans tons and tons of plans
Cooking: nothing, I'm on clear fluids today
Drinking: vitamin water
Reading: blogs online
Wanting: a new macbook pro
Looking: at the toddler trying to put markers up her nose
Playing: Dr Mario
Wasting: time, I could be doing something productive
Sewing: my autumn collection
Wishing: money grew on trees
Enjoying: watching the baby learn to crawl
Waiting: For a package from Canada
Liking: my issue of Ottobre, I want a subscription!
Wondering: Why babies grow up so fast.
Loving: My family
Hoping: That timing works out with my friend's baby and me going to visit
Marvelling: at T standing in front of the tv naming and signing things she sees
Needing: A nap
Smelling: Febreeze
Wearing: PJs
Following: www.twitter.com/curation_nation
Noticing: The lack of humidity - as shown by the lack of tight curls in T's hair
Knowing: Time is fleating
Thinking: about two craft swaps I'm in
Bookmarking: some patterns I want to try
Opening: A new vitamin water
Giggling: At the girls blowing raspberries and giggling at each other.
Feeling: Apprehensive
Sunday, July 11, 2010
Paper Cakes is having a HUGE Sale!
My friend Chelsea over at Paper Cakes Finds is having a SUPER sale because she's shutting down her etsy shop while she goes on Maternity Leave.
I highly recommend you check her out TONIGHT before she is gone forever. (Ok I'm exaggerating she'll be back in September, but do you really want to wait that long?)
Tuesday, June 29, 2010
Almost 7 months ALREADY?
(Dahlia at 6 weeks)
Where does the time go?
I'm writing up Dahlia's story. I've tried to keep it as everyone friendly as possible, but if you don't want to read about a birth skip this post. It is photo heavy at the end. So if you want to look at photos and skip the story just scroll down.
Here's Dahlia's story...
Back in the beginning of December I was exhausted. Extremely pregnant as well as being mom to a 13 month old who's seconds away from walking. (She held off until her sister was born. Then she took off) I had some serious prodomal labor for weeks. Things would seem like they were progressing but then they would stop abruptly. On Tuesday Dec 8th I was feeling hopeful that things were moving in the right direction, but chasing T around was exhausting and there was no way I'd be able to really let myself surrender to labor with her there. We asked my father in law to take her for the day. My husband stayed home and we tried to get things go by walking and bouncing on the birth ball. It seemed like things were going well but they'd keep stalling and I was losing my morale.
From about midnight to 2am I chatted online with a few friends. They really REALLY helped. Because of all the false starts I wasn't sure that this was "it". They convinced me that even if it wasn't it, I was doing great. Soaking in the tub felt SO fabulous. By 3am my contractions were only 8-12 minutes apart. (For the uninitiated they tell you to go to the hospital when they're 4 minutes apart for 1 hour and lasting 1 minute each) Labor with T lasted 30 hours so I figured we were in for the long haul.
At 3:30 I called the midwife. I lied. I said my contractions were 6 minutes apart. We were on the phone for 8 minutes with no contraction. Right as we were going to hang up I had a contraction, I'd been groaning through them for about an hour at this point. She heard me and said "I'll be right there!"
I got out of the bathtub and walked to the bedroom. I don't think it took too long. But I had 3 contractions on the way! (from 8 minutes apart to two minutes apart in 30 feet) My fabulous husband started the air pump to blow up the pool. I wanted a water birth.
That pump was incredible.
I know, you probably don't hear people gushing about air pumps very often.
The noise it made was great. When a contraction would come on I would match the pitch of the pump with my groans. On the one or two occasions I started groaning at a higher pitch it quickly turned into a panicked scream.
Only a couple contractions after our arrival in the bedroom my water broke. I was beyond words at this point but managed to yelp a little "help" and a towel showed up on the floor. With a little help I climbed into the bed and got on my hands and knees.
The very next contractions something strange happened.
I started to push.
I didn't have any control over this. The contraction started to get intense (I wasn't getting a break between them at this point) and my body shuddered and I felt like I was standing beside myself trying to convince myself that I couldn't push, the midwife was on the way and we needed to wait for her. Afterwards I shuttered and came back into my body. I reached down to see if my accidental pushing was effective. It was. I could feel the top of her head.
This time I wasn't able to yelp.
Another wave came on and I found myself standing looking at myself thinking "what is this nutcase doing??"
Fortunately this time my husband looked up from the pool inflation and realized that things were a bit further along than he'd thought. He came around in time to see her head emerge.
What he did next I find amusing. Even in the moment I almost laughed at him.
He looks me in the eye and says "Kath, the baby's coming."
As if I didn't know.
He grabs the phone and dials 911 - since the midwife still isn't here. They transfer him to the wrong dispatch, who proceeds to try to give him the phone number for the right one. He hung up and dialed 911 again. Fortunately this time they sent him to the right people. By the time he was actually speaking to someone he was also holding Dahlia wrapped in a towel.
It didn't take long for an EMT and a Police officer to arrive. The EMT didn't have everything he needed. He radioed in to have someone bring something and I asked him what he needed and directed him to the dresser, where I had all the supplies laid out. (We planned a home birth) He was shocked and quite happy to find everything he needed right there.
While he checked Dahlia out I got my cellphone out and called the midwife and called a friend. (Note: I'm still on my hands and knees afraid to move because Dahlia is still attached)
The midwife arrived shortly thereafter. She helped me get into a better position, where I could hold the baby. The EMT announced that we should pack up and head to the hospital now. We politely declined. "But you just had a baby??!!" "Yeah... but I'm not injured or sick? There's no emergency?" "Ok.. umm.. sign this?"
It was a perfect experience. It was completely peaceful. Her birth was a moment I shared with only my husband. It was empowering, it was thrilling and it was perfect. It wasn't until he called 911 that things went nuts.
It wasn't how we planned but I wouldn't change a thing.
Later that day she was captured on Skype by her grandma.
A week later:
At 1 month
At 2 months
At 3 months
At 4 months
At 5 months
At 6 months
At almost 7 months on a skype call with my mom
Friday, June 25, 2010
Sew Along: Popover Sundress Week 3
So now that we have all the fabrics cut out we're ready to sew! This dress comes together so fast you'll be amazed!
We'll work one side at a time. Take out one yoke and one dress piece. Set aside the other two pieces for now.
First, pin the yoke (the small piece) to the top of the dress with the right side of the yoke facing the wrong side of the dress. (like in the picture)
Sew these piece together along the top edge with a 1/2" seam allowance. Fold the yoke up and iron it.
Flip it over. Fold the top 1/2" of the yoke down and iron.
Fold the Yoke in half and iron.
Pick your trim - this is optional. Before we sew down the yoke we'll need to sandwich the trim between the two pieces nice and straight. I have a bunch I'm trying to choose from. Once you've got it in there, pin the entire "sandwich' together and sew the folded yoke and trim together really close to the edge of the yoke.
Repeat all of this with the second set of pieces. These become the back and the front of the dress.
Place the back and front together with the right sides of the fabric together. Sew the side seams.
The dress is almost finished! We'll talk about the bias tape next time. If you want to make it check out the bias tape tutorial here.
Help me pick a rickrack color? I'm leaning towards white...
orange:
black:
white:
pink:
light pink:
Monday, June 21, 2010
Sewing Baby Girl Clothes
One of my crafty friends learned recently that she's having a girl. I have several other friends who are expecting girls as well. When I first heard, I thought I would put together a collection of some of my favorite free patterns. This is not even close to a comprehensive list of all the patterns available out there. Not. Even. Close. These are just the ones I've made myself.
I've decided to share it here so other people can enjoy the love too.
There are several blogs that are absolute gold for finding sewing patterns and tutorials.
Check out:
Made
Made by Rae
Luv in the Mommyhood
As for particular projects that I love, I've only included one from each source. But browse around each source! There's plenty more!
Check them out! (The images are links to the projects)
(used with permission)
If this isn't enough, also check out Craftster, Burda Style or browse around links in those blogs I mentioned. I really can't recommend them enough. I can get lost spending hours and hours clicking through from blog to blog.
Labels:
around the web,
Baby,
links clothes,
Sewing,
tutorials
Subscribe to:
Posts (Atom)