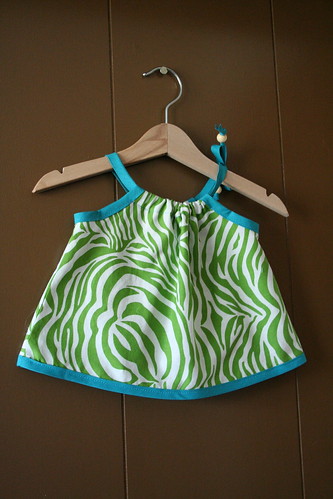
Bias Tape intimidated me for a long time. And for a long time I was applying it wrong. So I've put together this little tutorial to help others use bias tape better.
I'm going to show you how to make bias tape, how to finish the ends for something like a strap (like in the Oliver and S Popover Sundress), how to attach to fabric for a trim and how to connect it to form one continuous piece around a circle.
First, what is bias tape?
Bias tape is a strip of fabric cut on the bias. It can be single fold, double fold, thick, thin. You can buy it premade or make your own. I use the premade when I want a solid color and make my own when I want a more interesting visible trim. Some people use bias tape to finish seams. It's also useful for straps, hems, and binding. The reason it is cut on the bias is to give it more stretch and flexibility. Sometimes if I'm making a strap for a dress or something where the flexibility is not important I won't cut on the bias. But anytime you're going to use it to trim, particularly around curves and corners, cutting on the bias will make it so much easier to use.
Making Bias Tape
So many times I've been laying out patterns on fabric to find that the only reason they want as much fabric as they do is because there's a long strip of bias tape. With a little extra effort I've found a way to use significantly less fabric - as long as you don't mind a few seams in the bias tape. Here's how:

Assemble your materials. You'll need: a rectangle of fabric - I'm using half a fat quarter, coordinating thread, scissors, and a ruler.

Lay the fabric out and fold one corner to the opposite edge to create a right angled triangle.

Cut the triangle out and place on the opposite edge

Place right sides together and sew to create a solid trapezoid of fabric.

(alternatively you can simply cut a trapezoid out of a larger piece of fabric, but this method leaves no scraps.)

Decide how thick you want your finished tape to be and multiply by 4 to figure out how wide the strips you will need will be. I want half an inch so I need to make 2 inch strips.

Cut a series of strips that width.

To sew the strips together place right sides together like in the image.

Sew across where the two fabrics cross.

Unfold, press and trim the excess fabric and thread. Repeat with all the strips to create one long piece.

Fold in half and press (iron) to mark center line. Unfold and fold the edges to the center line and press. Re-Fold along the center line again and press. This will create a strip of fabric that is 4 layers thick.
Making a strap
To make a strap some sources will tell you just to fold in half an inch and sew. This is method is a bit more complicated but it leaves a beautiful finished end.

First fold back along the center fold so that the center is folded the opposite way it naturally creases

Sew across the edge, and clip.

Turn right side out, allowing the center to fold as it should. To get a nice corner use a blunt object that will not damage the fabric to poke out the corner.

Sew close to the edge.

Voila, a strap.
Attaching bias tape as trim

Lay out the section you want to attach the bias tape to. In this example it will trim armholes of a shirt to create a nice finish on a sleeveless top.

Unfold and pic the raw edge of the bias tape to the raw edge of the fabric. it doesn't matter which side of the fabric you pin to because this seam will be hidden.

Using a small seam allowance, sew the bias tape to the fabric, being careful not to extend past the fold line.

Fold the bias tape over the raw edges

Sew close to the fabric along the bias tape to finish
Connecting to form a continuous loop
Some places you'll need to connect the bias tape. For instance when used as trim on a hem. Here's how to line up the connection with another seam.

Pin the bias tape all the way around leaving a little room near where the join will occur.

Bring the bias tape together and create a fold where the seam you want to blend in with is.

Press with fingers or iron to create a guide line.

Sew along the guide line, trim edges.

Open, finger press and pin seam before continuing, by sewing to the raw edge, folding over and sewing close to the fabric along the entire continuous piece.

The two seams should line up.

Enjoy!


What is the green zebra print thing you're working on in this? I love the fabric!
ReplyDeleteThis is so great - thank you! As a total beginner, it was lovely to find such a clear tutorial on bias tape :)
ReplyDeleteLove this! Thanks for the great tutorial. I just started making dresses for my little girl, and I love the way bias tape finishes the look- but it's pretty expensive to buy the pre-packaged stuff.
ReplyDeleteI know this is an older post but I just wanted to say THANK YOU- I was totally doing it wrong LOL This will turn out so much better I can't wait! =)
ReplyDelete