


Recently a couple of people have asked me for a simple sundress pattern they could sew for their little one.
I think it would be fun to have a sew along! I'll take it really slow for all the beginners and anyone who wants to pass where we are please feel free. Email me photos of your creations by June 30th and I'll share with the group!
Let's make this pattern. It's free and easy enough for the beginning sewers among us. To get started you'll need some fabric consult the following to see how much you'll need.
Main Fabric
Size 2T - 1 yard
Size 3 or 4 - 1 1/4 yard
Size 5 or 6 - 1 1/3 yard
Size 7 or 8 - 1 1/2 yard
In a contrasting fabric you will need a fat quarter regardless of size. (For the new sewers, a Fat Quarter is a 1/4 yard, but instead of it being 9" x 44" it's 18" x 22" Most craft stores carry fat quarters in their quilting section.) The pattern says you need significantly more, and while it's slightly easier to just use the layout they show, the way I suggest will waste a lot less fabric. We will either make our own bias tape from this or you can purchase double fold bias tape for the shoulder ties.
Make sure you have thread for your sewing machine in a color to match either the main fabric, contrasting fabric and/or the straps. (And if you're hand sewing this Bravo you have significantly more patience than I do!) You'll also need some pins, fabric scissors, an iron and ironing board, a printer and some paper.
If you want to add a little rick-rack or lace between the yoke and the main portion of the dress you'll need about 3/4 yard of it.
Monday, May 31, 2010

Sunday, May 30, 2010
Photography Before and After

Recently there was an Etsy article about Before and After photos. I decided I needed to put together a comparison.
The first image was shot in my yard. I had T stand in front of the shed because I didn't want a bright green background. Unfortunately there was very little cloud cover so all the shadows are really harsh and it really darkened the image. When I tried to lighten it in post processing I discovered that the contrast between the highlights and the shadows was too big for me to be able to do much with the image.
So I searched.
I searched for a place to shoot. My wishlist was rather long, and I had to go several miles from my house to find the perfect place but I'm thrilled with it now.
* I wanted somewhere outdoors so there was an abundance of natural light.
* I wanted somewhere shaded from direct sunlight so that even given the brightest day the light would not create such harsh shadows
* I wanted somewhere with a neutral colored background with some architectural interest. I didn't want just a plain white background (plus how do you entertain a toddler with a plain white background?)
This is what I found. It's perfect.

Over the past week I've reshot everything here. Dragging the dress form out is not convenient but I think the end results are worth it.


Sunday, May 23, 2010
The Bear
I don't consider where we live to be "in the country" but we're definitely not in the hub of civilization. New York City is about 30 minutes away. We have just over a quarter acre complete with a fabulous artificial hill made by our septic system. Eventually when it's in the budget and we have the time we're going to re-fence the yard with a white picket fence and I'd like to plant a few fruit trees and some raspberry bushes. Right now we have 4 or 5 different types of fencing surrounding our yard. Weeds everywhere and so many of our bushes and trees are in desperate need of pruning. We are slowly getting to the yardwork that needs to be done. Yesterday Justin trimmed the bush that was blocking the gas meter.
Last August Justin and I got married. While we were away on our honeymoon our friends who were staying at our house discovered that we had another visitor as well. A bear. This bear made a few appearances but I guess he was returned to somewhere appropriate for him to be because by September he was gone and we haven't seen him since.
Last night the ice cream truck came by and the whole neighborhood came out to indulge. It's amazing the sense of community that a frozen dairy treat can bring. One neighbor that our friend the Bear made his presence known yesterday morning. He's back.
Welcome to summer!
What does summer mean to you? Are your summers full of ice cream, neighbors and bears?
Friday, May 21, 2010
Tutorial - Shirt Front Placket
First photo

plack·et (plāk'ĭt)
n.
A slit in a dress, blouse, or skirt.
In order to fit a shirt over a head there needs to be some extra give to the neckline. Sometimes this happens because the material has a stretch to it - like with T shirts. Sometimes, with dresses in particular, there's a zipper. Recently I've learned how to make a placket that looks really sharp with a collar. It's like having a button down shirt except the buttons don't go all the way down.
First you need a pattern for your placket. You might be using a store bought pattern or you can figure out the size of the pieces you want. First figure out how long you want the placket to be we're going to call this number Y. You want to make sure you've left enough room for several buttons. You want to cut one rectangle 3" x Y.
The next shape is a little bizarre you can see what it looks like in the following picture. Draw this on paper before cutting into the fabric. Draw a rectangle 3" x (Y+1"). Cut it out and lay it facing you with the longer edges on the left and right and the shorter edges on the top and bottom. Draw a line 1/2" in from the left edge. Mark a point 1" up from the bottom along this line. Mark a point along the bottom 1" in from the right edge. Connect these two points. Mark a point 3/4" up from the bottom along the right edge of the rectangle. Connect this point to the one on the bottom. This will form an arrow, a little lopsided but we're taking some seam allowances into account. Draw a line from the left edge to the first line 1.5" up from the bottom.
This is what it will look like (this photo includes the interfacing which we will do in the next step) :

You need two pieces of interfacing. They're both going to be 1" x (Y-1") Iron them on 1/2" away from the left edge on the weird shaped one and 1/2" away from the right edge on the rectangle.

Line them up along the the right side of the front center as in the photo.
Sew the placket pieces to the front of the dress 1/2" away from the center. Stopping a half inch from the bottom of the rectangle and a half inch from the bottom edge of the other side.

Fold the seam allowance away from the center. and mark a dot a half inch up from the bottom of the rectangle, another dot horizontal and another dot 1/2" up from those two dots along the center. Like this:

Cut the front of the dress along the center line to the dot along the center line then cut from the center dot to each of the side dots. Forming an upsidedown Y.

Fold and iron the seam allowances like you see in the photo.

Now we're going to work on the side with the rectangle attached. So fold down the other side so it's out of the way.
Fold the rectangle in half with the right sides together, interfacing out. Sew just above the interfacing to the seam - which is 1/2" then clip the seam allowances like this:

Turn it right side out and iron

Do the same thing on the other side. This will form the point. You will probably need to fiddle with it to get it nice looking.

Edgesew (sew close to the edge) around the rectangle one. Draw a line an inch and a half up from the bottom point. Edgesew around the sides and top of the pointed one starting and stopping just below the line. Layer the pieces bottom layer, the little triangle flap of the front of the dress, then the top layer. Sew these layers together by sewing across the line you drew and then edgsew around the bottom portion of the placket.
Add button holes and buttons if you're using them. Finish the neck line with whatever collar you want to finish it with.
Saturday, May 15, 2010
Cupcake Jump Rope Dress

I'm sewing the Oliver and S Jump Rope Dress for a friend. This required me to learn a whole new skill set. Plackets.
More to come...
Monday, May 10, 2010
Tutorial - Making Labels
Now that I'm sewing for my shop, I need to label my stuff. I thought I'd share my label making process here.
Materials (all available at a craft store - twill tape is available at fabric stores):
Printable Iron on Transfer Paper
Computer and Printer
Iron
Scissors
Twill tape (I use 1/2" thickness) or satin ribbon
Directions:
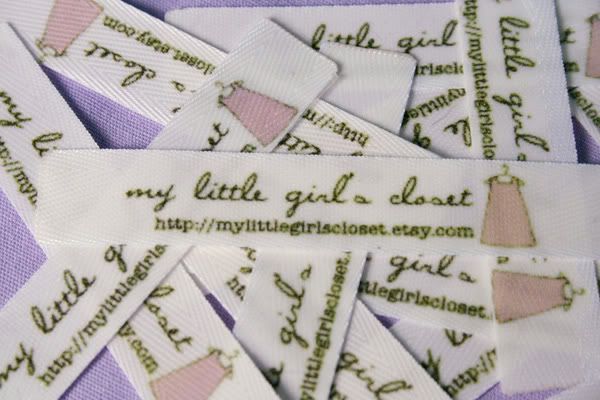
1. You will need to create a design to put on your labels. Something simple which includes your shop name is best. (I decided that since googling my shop name does not bring my shop up in the first 3 hits I would also include the shop address on the labels.) This needs to be slightly slimmer than the twill tape, so if you bought 1/2" twill tape make the image about 3/8"

2. The image needs to be mirrored to print as an iron on transfer. I also highly recommend repeating the image to fill the page. This will waste less of the paper.
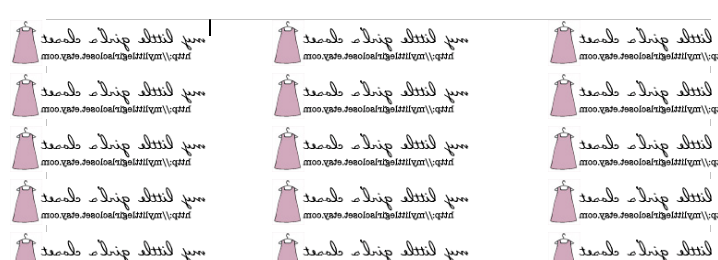
3. Print. I like to print on regular paper first to make sure that the image isn't too big for the ribbon. If it is make the necessary adjustments and check again. Assuming everything is how you want it, print on the iron on transfer paper and cut out the images to fit.
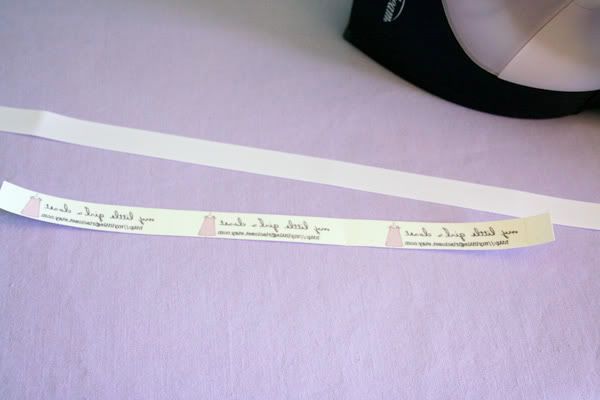
4. Carefully place the image face down where you want to iron it on. make sure there is no overlap of the transfer beyond the ribbon.
5. Iron. (Follow the directions on the transfer paper you bought.)
6. Once cooled remove the paper backing and your image should be transfered onto the ribbon.
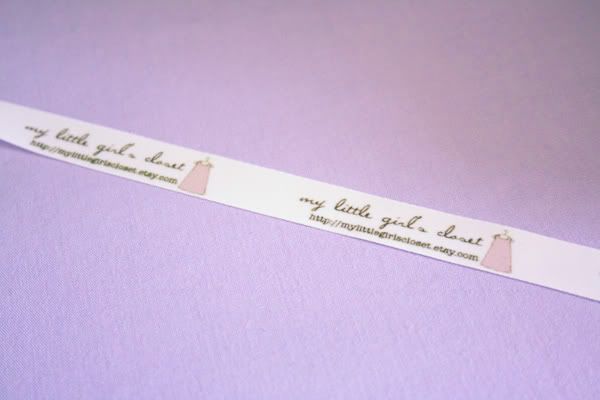
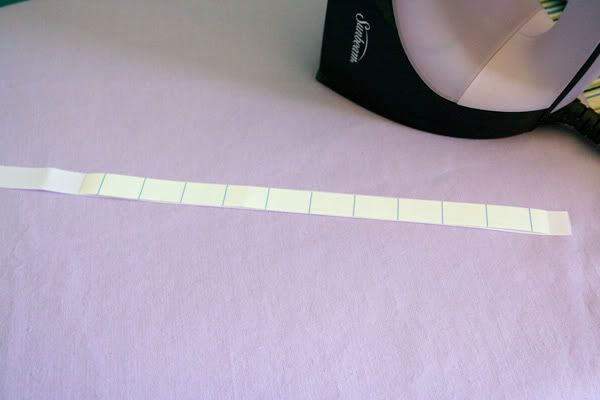
7. Cut the ribbon to the lengths you want the labels to be.
8. Seal the ends from fraying with heat. To do this: hold a lighter in your right hand and the ribbon in your left. Light the lighter and slowly bring the ribbon towards the flame. You will see the ribbon react to the heat. Be careful not to burn the ribbon (or yourself). The ends of the ribbon will melt and seal themselves from fraying. (if you've never done this before practice a bit before you do this to your labels)

(This shows the difference between a sealed end (left) and a freshly cut unsealed end (right)
9. Sew onto your work!
Materials (all available at a craft store - twill tape is available at fabric stores):
Printable Iron on Transfer Paper
Computer and Printer
Iron
Scissors
Twill tape (I use 1/2" thickness) or satin ribbon
Directions:
1. You will need to create a design to put on your labels. Something simple which includes your shop name is best. (I decided that since googling my shop name does not bring my shop up in the first 3 hits I would also include the shop address on the labels.) This needs to be slightly slimmer than the twill tape, so if you bought 1/2" twill tape make the image about 3/8"

2. The image needs to be mirrored to print as an iron on transfer. I also highly recommend repeating the image to fill the page. This will waste less of the paper.

3. Print. I like to print on regular paper first to make sure that the image isn't too big for the ribbon. If it is make the necessary adjustments and check again. Assuming everything is how you want it, print on the iron on transfer paper and cut out the images to fit.

4. Carefully place the image face down where you want to iron it on. make sure there is no overlap of the transfer beyond the ribbon.

5. Iron. (Follow the directions on the transfer paper you bought.)
6. Once cooled remove the paper backing and your image should be transfered onto the ribbon.

7. Cut the ribbon to the lengths you want the labels to be.
8. Seal the ends from fraying with heat. To do this: hold a lighter in your right hand and the ribbon in your left. Light the lighter and slowly bring the ribbon towards the flame. You will see the ribbon react to the heat. Be careful not to burn the ribbon (or yourself). The ends of the ribbon will melt and seal themselves from fraying. (if you've never done this before practice a bit before you do this to your labels)

(This shows the difference between a sealed end (left) and a freshly cut unsealed end (right)
9. Sew onto your work!

Sunday, May 9, 2010
Happy Mother's Day
This morning I was woken up with breakfast in bed. Stuffed French toast with cream cheese and strawberries.
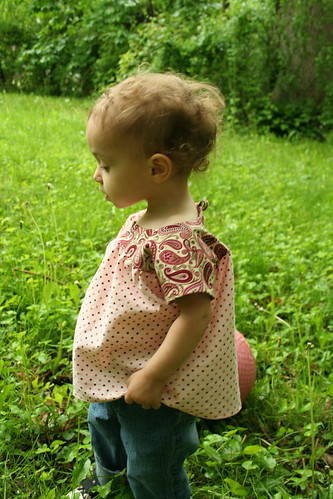
Yesterday I got some sewing time. Finished up the Ice Cream Dress View C (it's a blouse) that I'd been working on Friday and made another co-ordinating one.
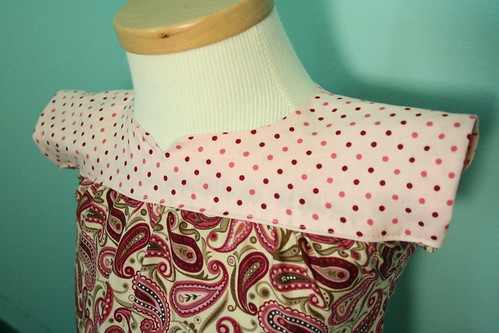
I made the smallest size in the pattern - 6 months. It seemed really big - as most home sewn projects do... Turns out it fit T, so I took her outside to snap a few photos. Had to make it really quick though, since I intend to sell the blouse and it was raining.
Friday, May 7, 2010
I can't wait to do this...
While I've been searching out patterns and reading various blogs about sewing. I discovered something amazing.
Before sending her off to kindergarten her little girl found out about the tradition of new school clothes... so she made a series of drawings of the clothes she wanted where it becomes amazing, and something I'm REALLY excited about doing with my girls is where she takes these drawings and actually makes the clothes! Check it out here and here.
I'm really excited about doing this with the girls. I think we'll end up making it our annual summer project. Once they are old enough I'm looking forward to their help too!
Thursday, May 6, 2010
Front Page Excitement!
Last night from 6-7pm there was an excitement in my house. This fabulous "high" created by discovering one of my etsy shop's listings made it to the front page. I'm in a new group on Etsy and we're slowly growing. This treasury was a way to feature our fledgling group and who knew it would be so popular!
My Runaway to the Circus T shirt made it. I had looked at it earlier in the day and saw that it had 172 views and 7 hearts. After making the front page it now has over 400 views and 20 hearts!!
My Runaway to the Circus T shirt made it. I had looked at it earlier in the day and saw that it had 172 views and 7 hearts. After making the front page it now has over 400 views and 20 hearts!!
Tuesday, May 4, 2010
Pictures to share
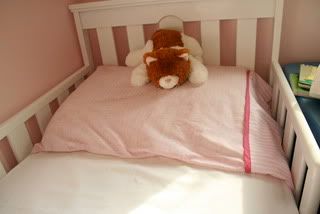
Yesterday I mentioned the sheet set I'm working on for T. Here's what the pillowcase looks like. I'm excited to work on the flat sheet but I'm waiting until I have some child-free time to do that.
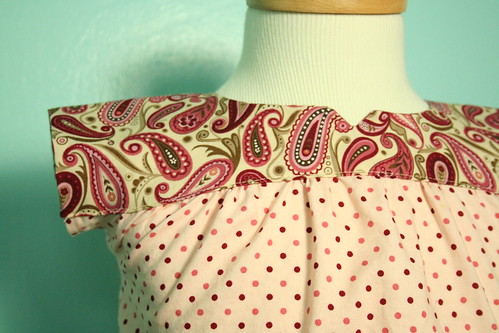
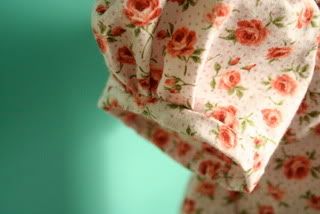
I completed a shirt from one of the vintage patterns. I love it! I'm looking forward to making a few more from that pattern.
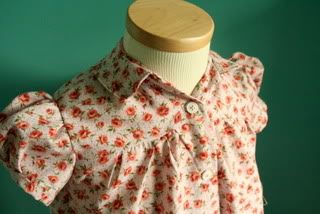
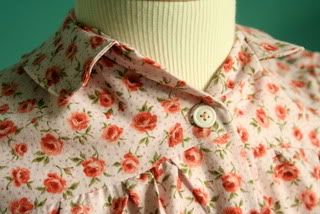
detail of the puffed sleeves...
The gathers are at both the top and the bottom of the sleeve, I think this give it the retro feel...

I completed a shirt from one of the vintage patterns. I love it! I'm looking forward to making a few more from that pattern.


detail of the puffed sleeves...
The gathers are at both the top and the bottom of the sleeve, I think this give it the retro feel...

Monday, May 3, 2010
The Quest for Toddler Bedding
T has moved to a toddler bed. Her bed however is lacking bedding. Every single "toddler bedding" set I've found is either prohibitively expensive or Disney. Now I have nothing against Disney, but I think that it's crazy that I can only find Tinkerbelle and Cinderella sheets for my 18 month old.
Fitted sheets are easy to find in solid colors because they're just crib sheets. Where I've been running into problems is finding a flat sheet - or a set that includes a flat sheet. I've decided to make her a sheet set. (And to make as many copies of the set as I can from the fabric I have - since I'll want the two girls to have matching sets when D moves to a big girl bed.)
I've been browsing around trying to find the "right" fabric for a while. Found a pink fabric with the alphabet on it and a coordinating striped fabric on clearance at Joann's. Turns out right now their clearance fabric is 50% off too. So at $1.50/yard i bought what was left on both bolts. (5.75y of the alphabet and 2.5y of the stripe)
Today I used this tutorial to make a pillowcase. It went quite well, though the pillowcase was a little large - which was an easy fix. I have pictures to post when I get to uploading them from the camera.
Tomorrow I'm hoping to find the time to make the flat sheet. Only if it rains though, because if it doesn't we're going to the zoo.
My new dress form still doesn't have a name. Any ideas? Trying to decide between a boy's name (I don't know why I keep thinking of it as a "he" when "he" has never worn anything but dresses...), a Mobster type name - given the shady situation I got it in or one of the names that my husband vetoed when we were trying to name our daughters... What would you name it?
Saturday, May 1, 2010
Oliver and S Puppet Show Dress and Tunic
Several weeks ago I mentioned that I was working on the Oliver and S Puppet Show dress.
Now that I have a dress form (who still needs a name!) I thought I would show you what I've made.
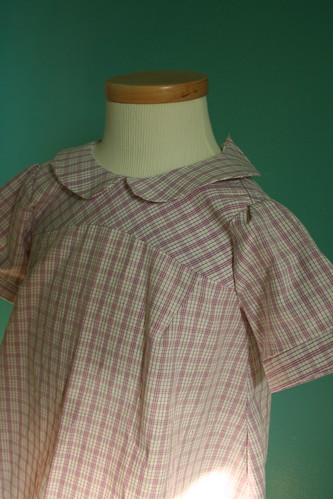
The first one is actually tunic length and has matching shorts in black with the darker blue bias trim. I still haven't sewn on the buttons or hand sewn the hem.
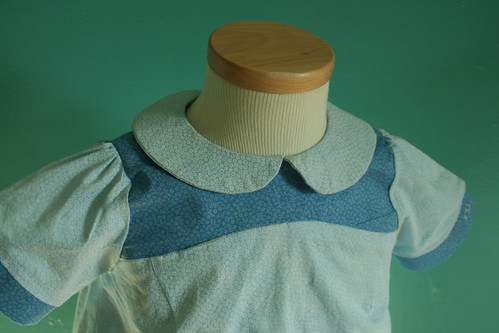
After making it I gained the confidence needed to play with the pattern a little. I decided to try upcycling a men's shirt. It worked out beautifully. There's even a pocket on the bum of the dress - I didn't want to remove it, I wanted to leave the integrity of its origins in tact. And the best part? No need to sew on the buttons or do the hem!
Now that I have a dress form (who still needs a name!) I thought I would show you what I've made.
The first one is actually tunic length and has matching shorts in black with the darker blue bias trim. I still haven't sewn on the buttons or hand sewn the hem.
After making it I gained the confidence needed to play with the pattern a little. I decided to try upcycling a men's shirt. It worked out beautifully. There's even a pocket on the bum of the dress - I didn't want to remove it, I wanted to leave the integrity of its origins in tact. And the best part? No need to sew on the buttons or do the hem!
Subscribe to:
Posts (Atom)


